Wait until you see how these tiles came out! I am truly amazed. This is very simple and you may want to give it a try yourself on some dated/unwanted tiles. The process is too easy! If you go to the Delta Paint website and read about PermEnamels, there is a step by step guide. You can find PermEnamels at Michaels and A.C. Moore. Here again, to refresh your memory, are the "Before Tiles". They did not match the homeowners new decor in this kitchen.

"Before Tiles"
This was a small project and the first time I have used PermEnamels on tiles. I only had two small rows of tiles to do. This one and one below the hood of the stove.
The first step is to wash the tiles with soapy water, rinse and dry well. Next, you apply the PermEnamel Conditioner with a brush to the surface and let dry for 1-4 hrs. The instructions say if you wait longer than 4 hrs. to continue painting, you must reapply the Conditioner again. I was at the house doing other rooms, so I began the painting after 1 hour.
I used an Ivory color PermEnamel to base coat over the existing tiles. It took 5 coats to cover the patterned tiles completely. I waited 1 hour between coats when applying the paint. The paint is very thick and you should not work it…just brush on thin layers, no over brushing.
After this was dry, the next day in fact, I began my design work. Now, I wanted this to match the olive vines on the walls I did in this kitchen, so I switched to the same craft paints I used for that. I felt the PermEnamels were too thick for the look I wanted. I will seal everything tomorrow with the PermEnamel Satin Sealer. The sealer comes in satin or gloss.

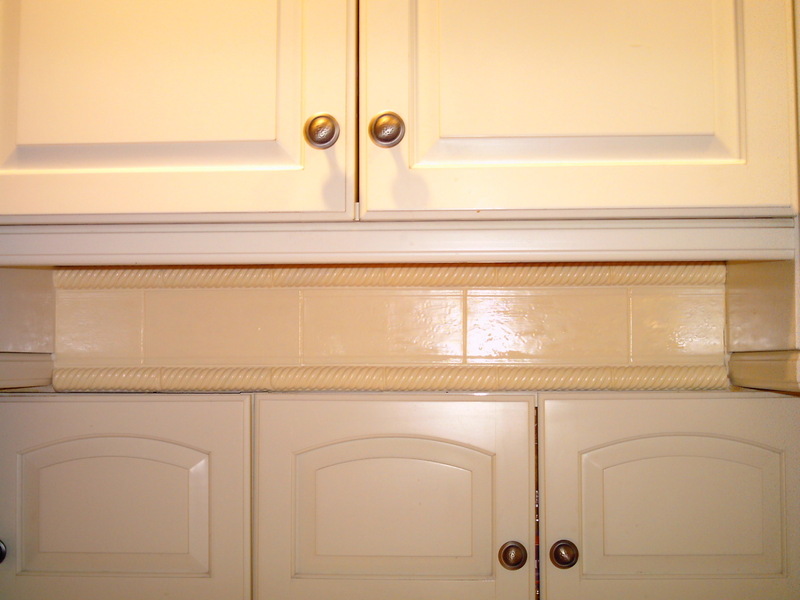
Voilà! Here’s the new tiles! I did a soft 1 color glaze over the Ivory PermEnamel base and then added the vine. Those rust colored horizontal stripes were blue before. I used the PermEnamel on those too.

Here are the tiles over the hood of the stove.
I was able to finally glaze the Problem Wall where I had to use a hack saw to get the coat rack off the wall. That wall is really not in good shape. I did my best to patch it up, but you can still see where the coat rack once was. It’s faint, but I see it. Hopefully, the homeowner will put a picture up to hide the blemishes. 🙁 You don’t see it from the kitchen though, looking out to the back entry. 🙂

Now when you look out from the kitchen to the back hall doorway, it all blends.

The Problem Wall. You can see where the coat rack once was, to the top right of the door. 🙁 That’s why good prep work is so important. That was not part of this contracted job, but I did do my best. I felt it was not crucial, because it’s up high and in the back hallway where a door opens up onto this wall to the garage.
In the Dining Room…good progress, but no pics to show. I decided to roll on one more layer of the Lusterstone diluted with water, with a shaggy roller before I troweled more. This worked great. I was able to trowel one more layer on almost the entire Dining Room before I left today. I will see how I like it tomorrow. I may try rolling on a very, very thin watered down layer with a smooth foam roller as my last layer. I want to see if this will give it a more "Lustery" look. I should finish up with this job tomorrow. I also have a few more olive vines to add over 2 doors in the Kitchen. We were waiting to see how many and where the vines would go once the tiles were done.


